Have you noticed some of the annotation symbol you use changes from one symbol to another when you switch between Family Types? The visibility of the graphic symbol can easily be controlled by adding a few Family Types and Parameters.
I am going to use the Curtain Wall tag family that I discussed in the previous post Create Curtain Wall tag looks identical to Window tag for this tutorial. Say you wanted to tag both the Exterior and Interior curtain wall / storefront, but wanted to use different symbol to distinguish them. My goal is to create a Hexagon symbol as the Exterior tag and Pentagon symbol as the Interior tag.
Create the symbols
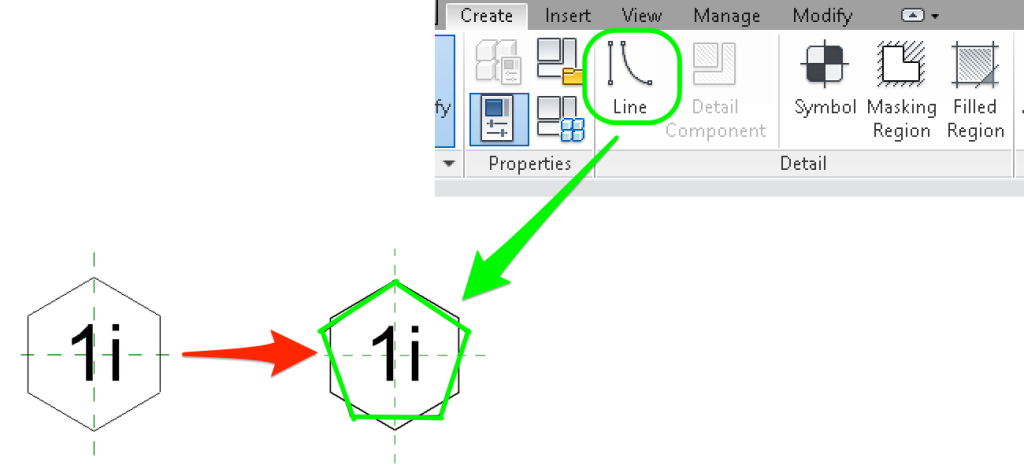
First, I opened up the curtain wall tag that was created following the tutorial in the previous post. Currently there is only a hexagon symbol inside the family. I will need to create a Pentagon symbol. Go to Create tab > Line (under Detail Panel) to draw the pentagon. Draw the pentagon symbol on top of the hexagon.
Create New Family Types
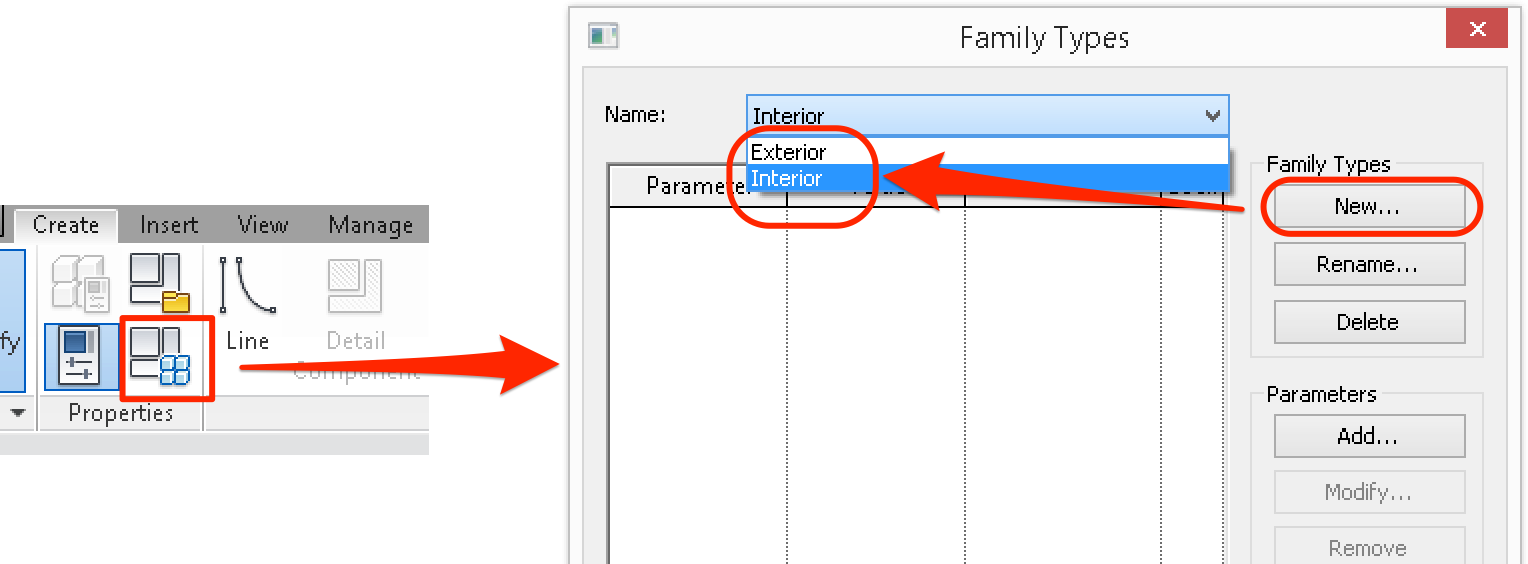
From the Create tab, click on Family Types (under Properties Panel). In the Family Types window, click Family Types > New. We need to create two new family types: Exterior & Interior. (You are free to name the types anything you want.)
Create New Parameters
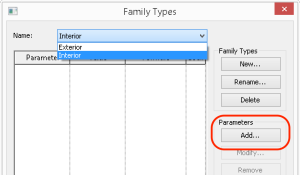
Next, we will create two new Parameters. These Parameters will be used to control the visibility of the hexagon and pentagon symbol for each Family Type. In the same Family Types window, click Parameters > Add.
Create an Exterior and Interior Parameter following the image below.
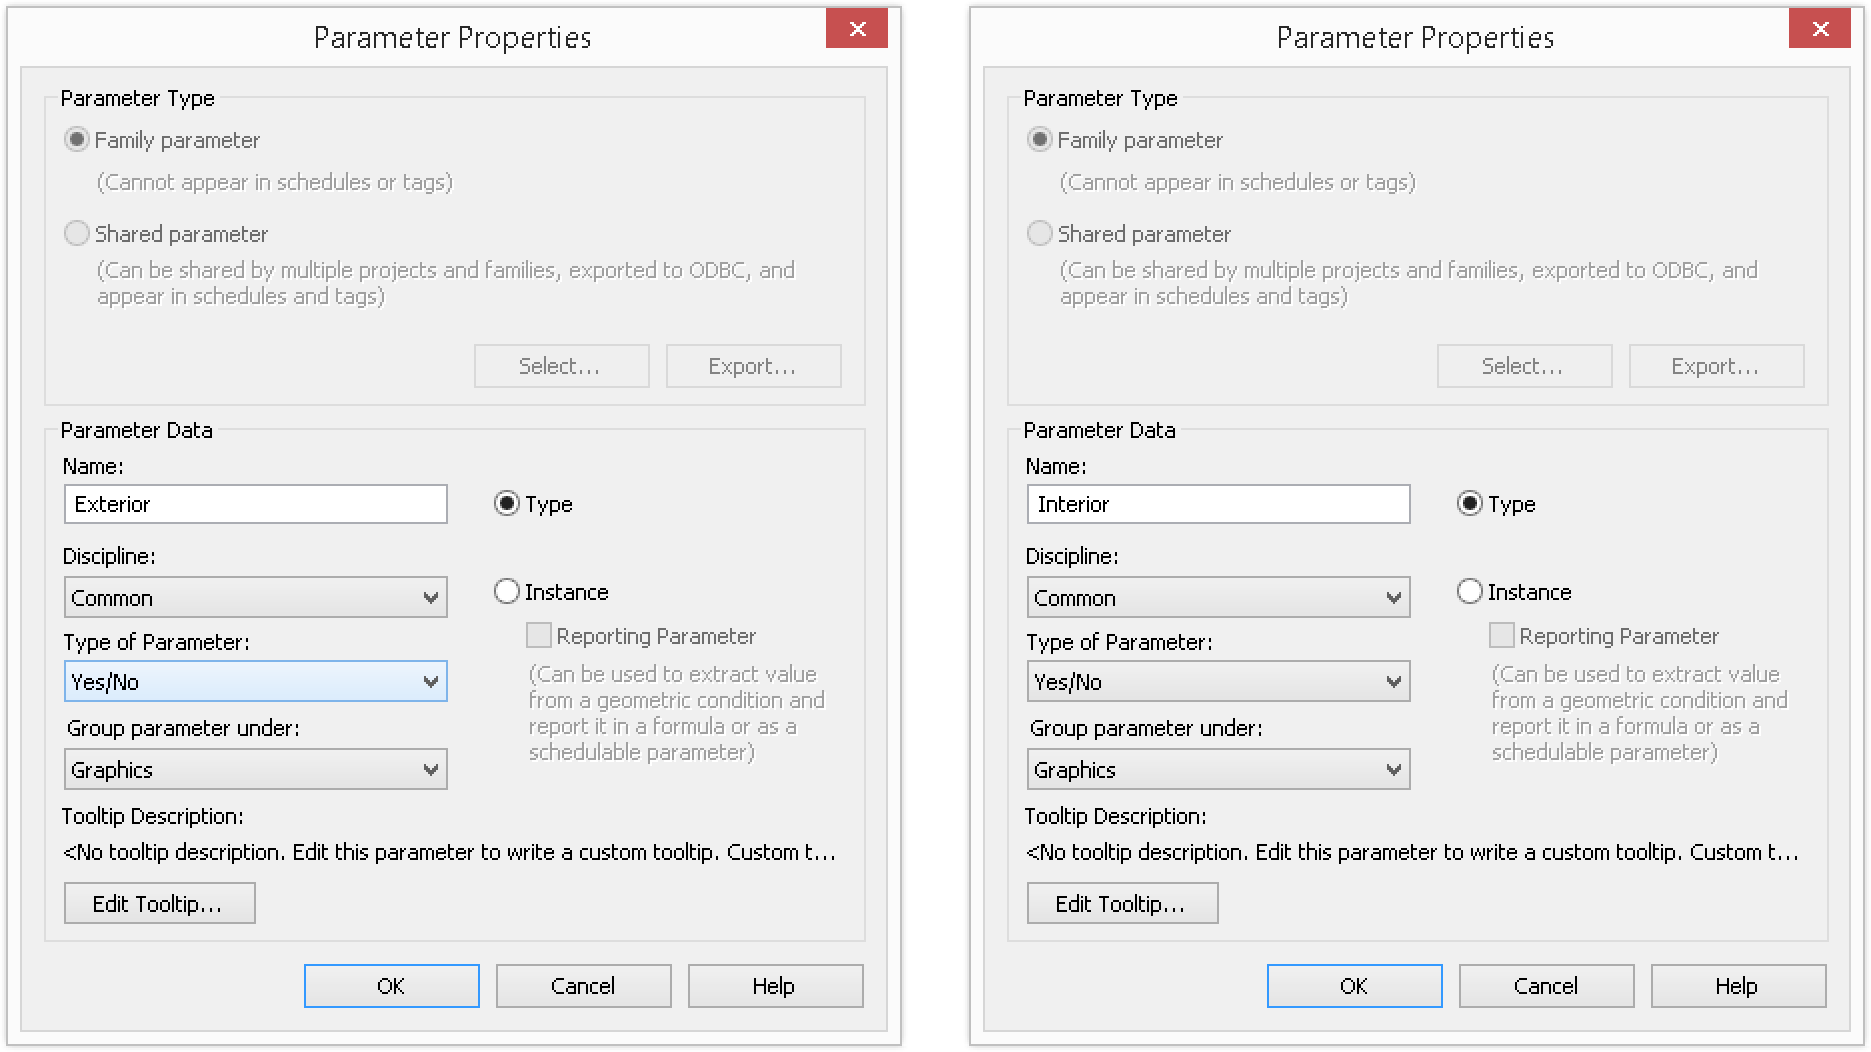
Once the Parameters are created, you will see these parameters are now available for your use in the Family Types. Each Family Types should contain the same list of parameters. Next, select the Exterior Type, check the Exterior Parameter; select the Interior Type, check the Interior Parameter.

Assign the Parameter to elements in the Family Model
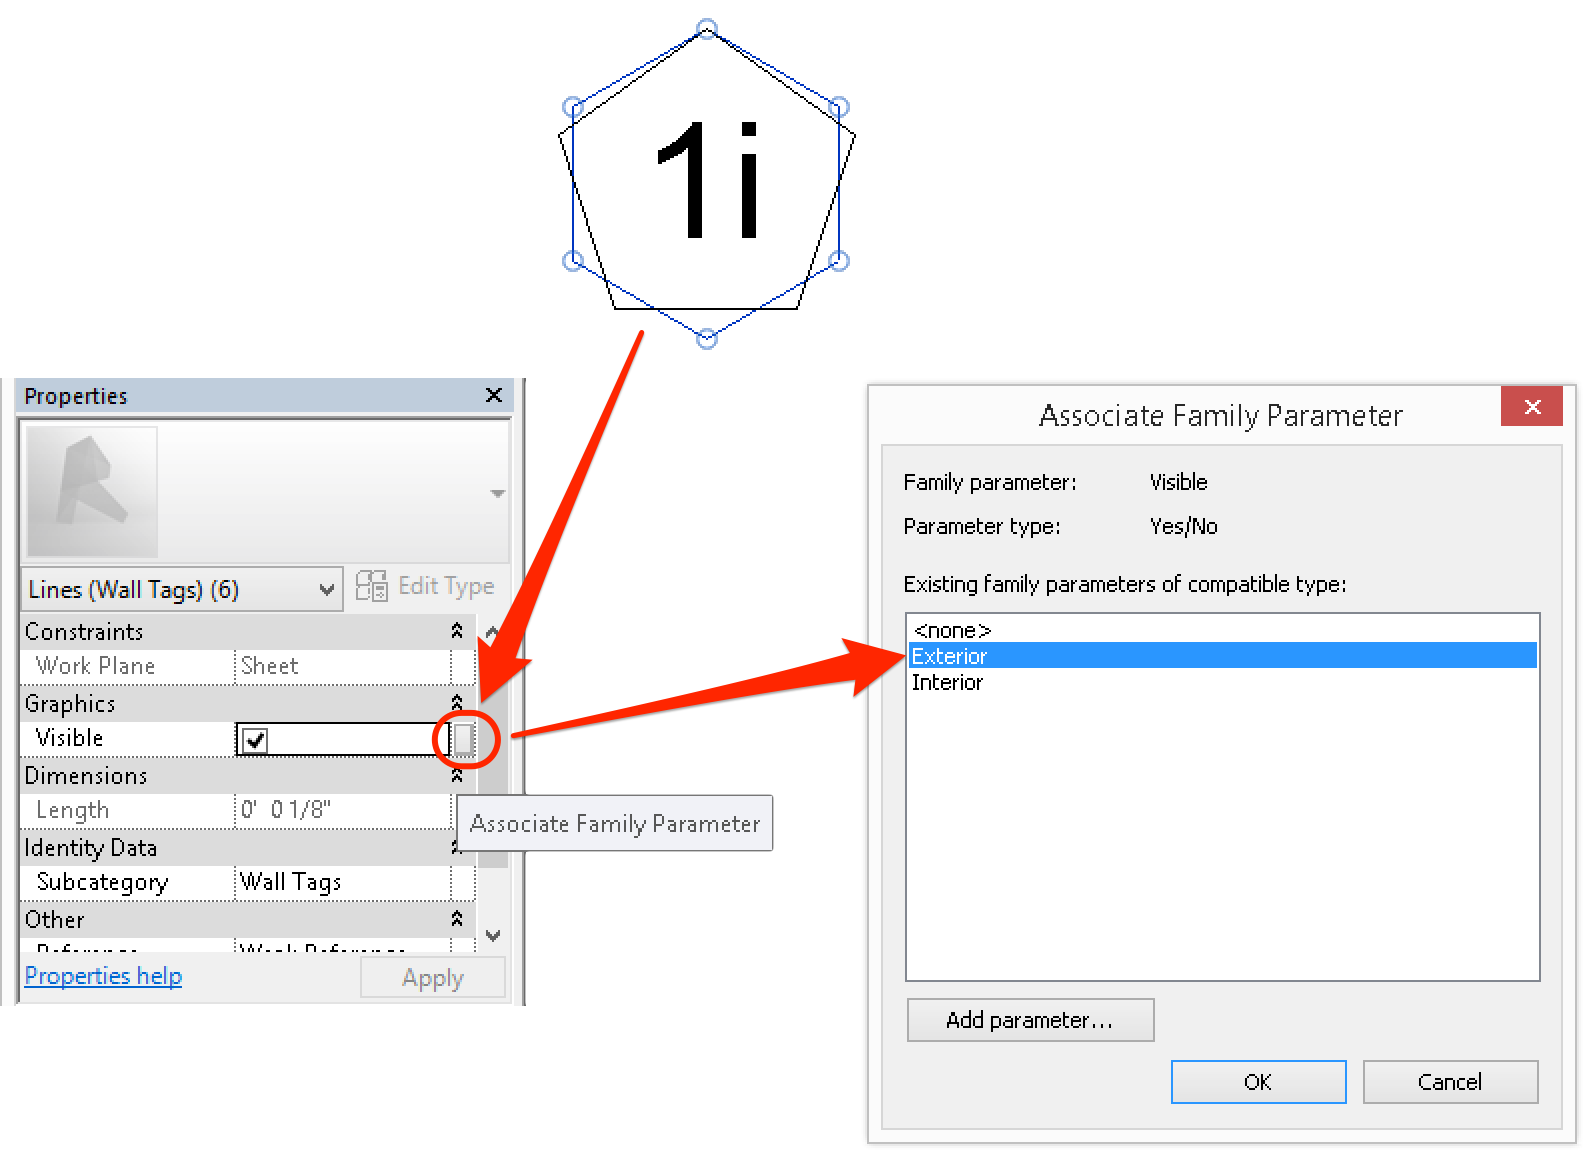
We are now ready to assign the Parameter we just created to the element in the Family model. In this case, the element will be our Hexagon and Pentagon.
Select the Hexagon, next, go to Properties and click the grey box next to Graphics | Visible. In the Associate Family Parameter window, select Exterior from the list of Parameter. What I am doing here is to tell Revit to associate the Hexagon symbol with the Exterior Family Type we definite just now.
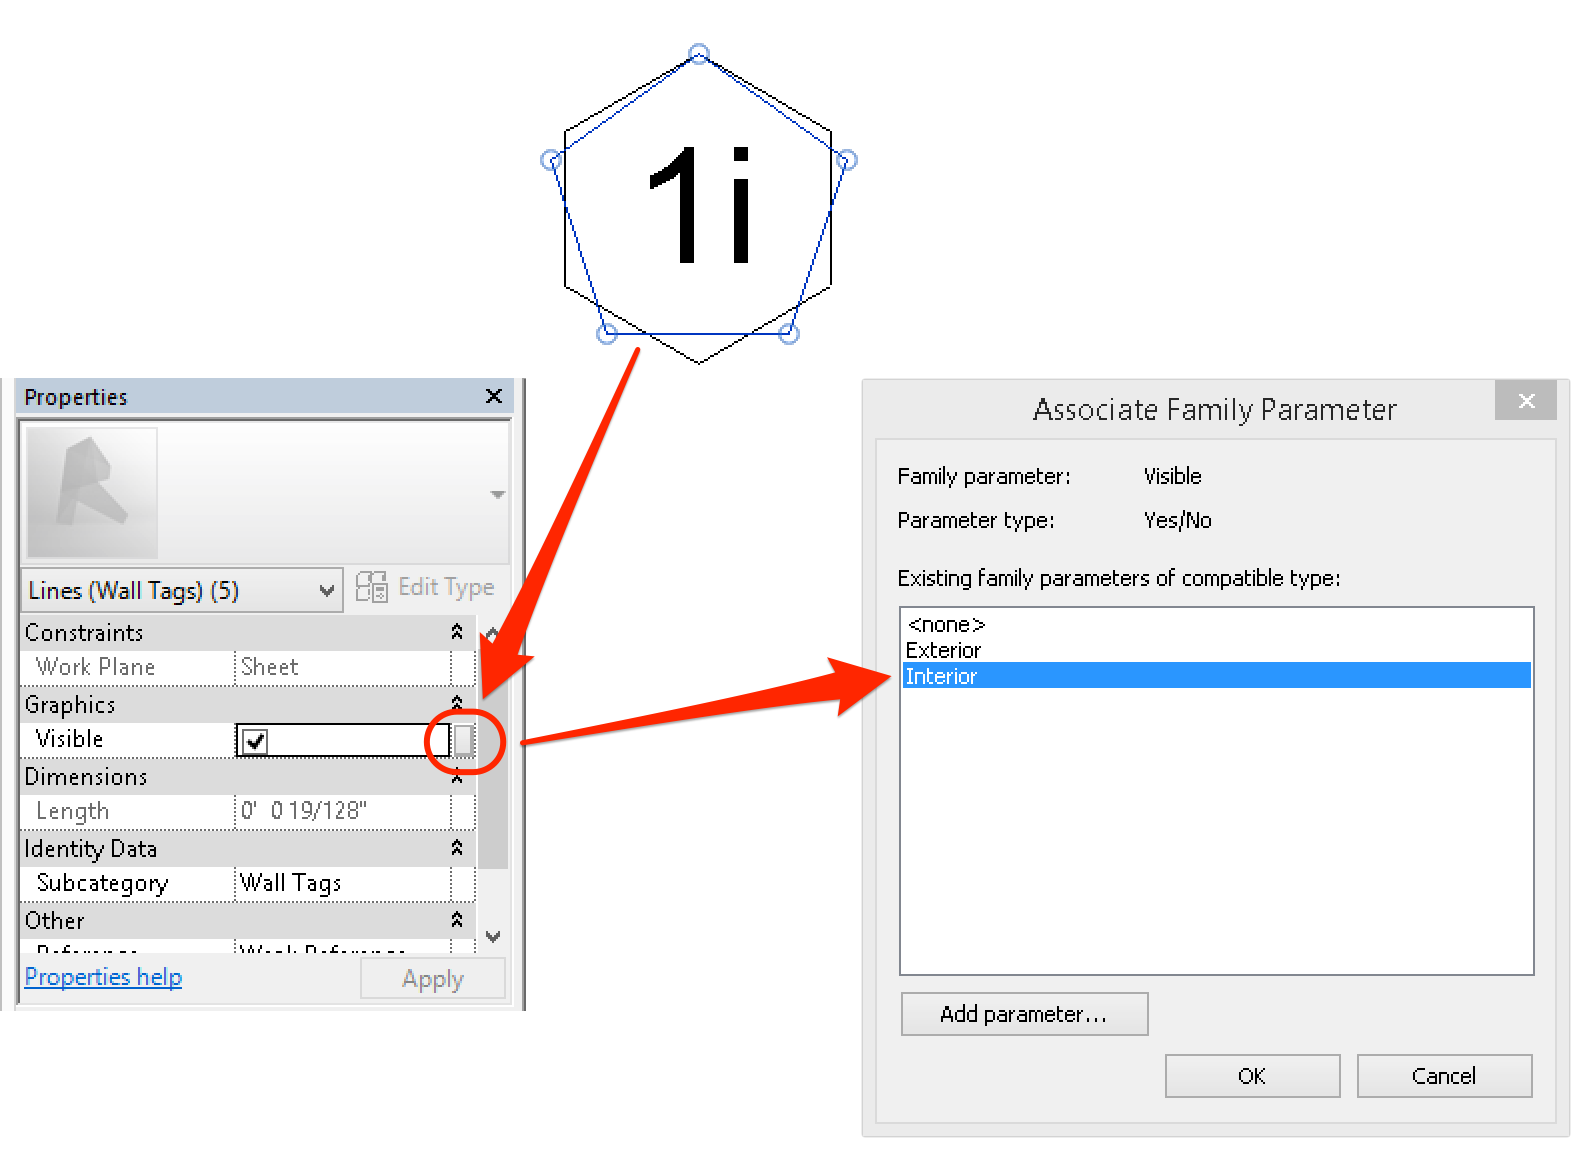
We will do the same thing to the Pentagon symbol. Select the Pentagon, go to Properties and click the grey box next to Graphics | Visible. In the Associate Family Parameter window, select Interior from the list of Parameter.
Save and Load Family
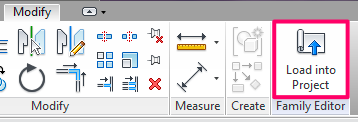
Save the family and Load it into the project.
Understand the Concept
Are you confused with why we need to create 2 Family Types and 2 Parameters? An analogy is to look at the Family Type as a “bag”. The bag is filled with all the Parameters you have defined. Each parameter represents width, length, height, material, etc… information about the family model. You can make the Parameter meaningful by assigning these parameters to your family model. You can create as many “bags” as you want with different width, length, height, materials, etc by changing the parameter data. In our case, we have two “bags”, the Exterior bag and Interior bag. Inside each bag, we have parameters that allow us to choose to display the exterior or interior symbol by checking or unchecking the check box. Note: One important thing to keep in mind: No matter how many parameters you have defined in the family, if you did not associate them to the family model, those parameters are meaningless.
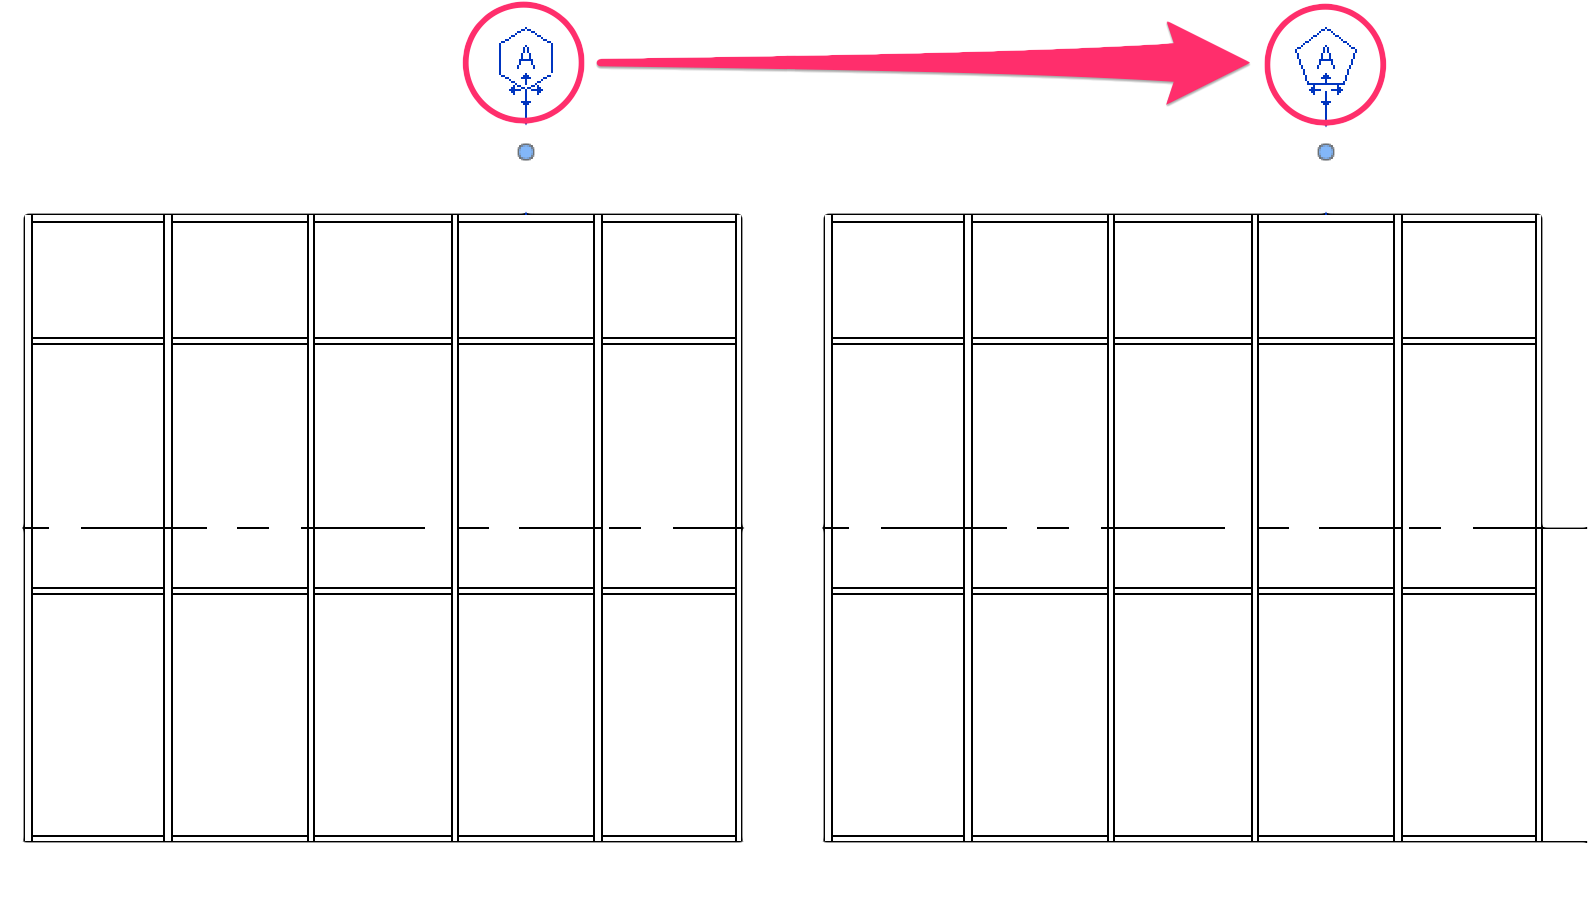
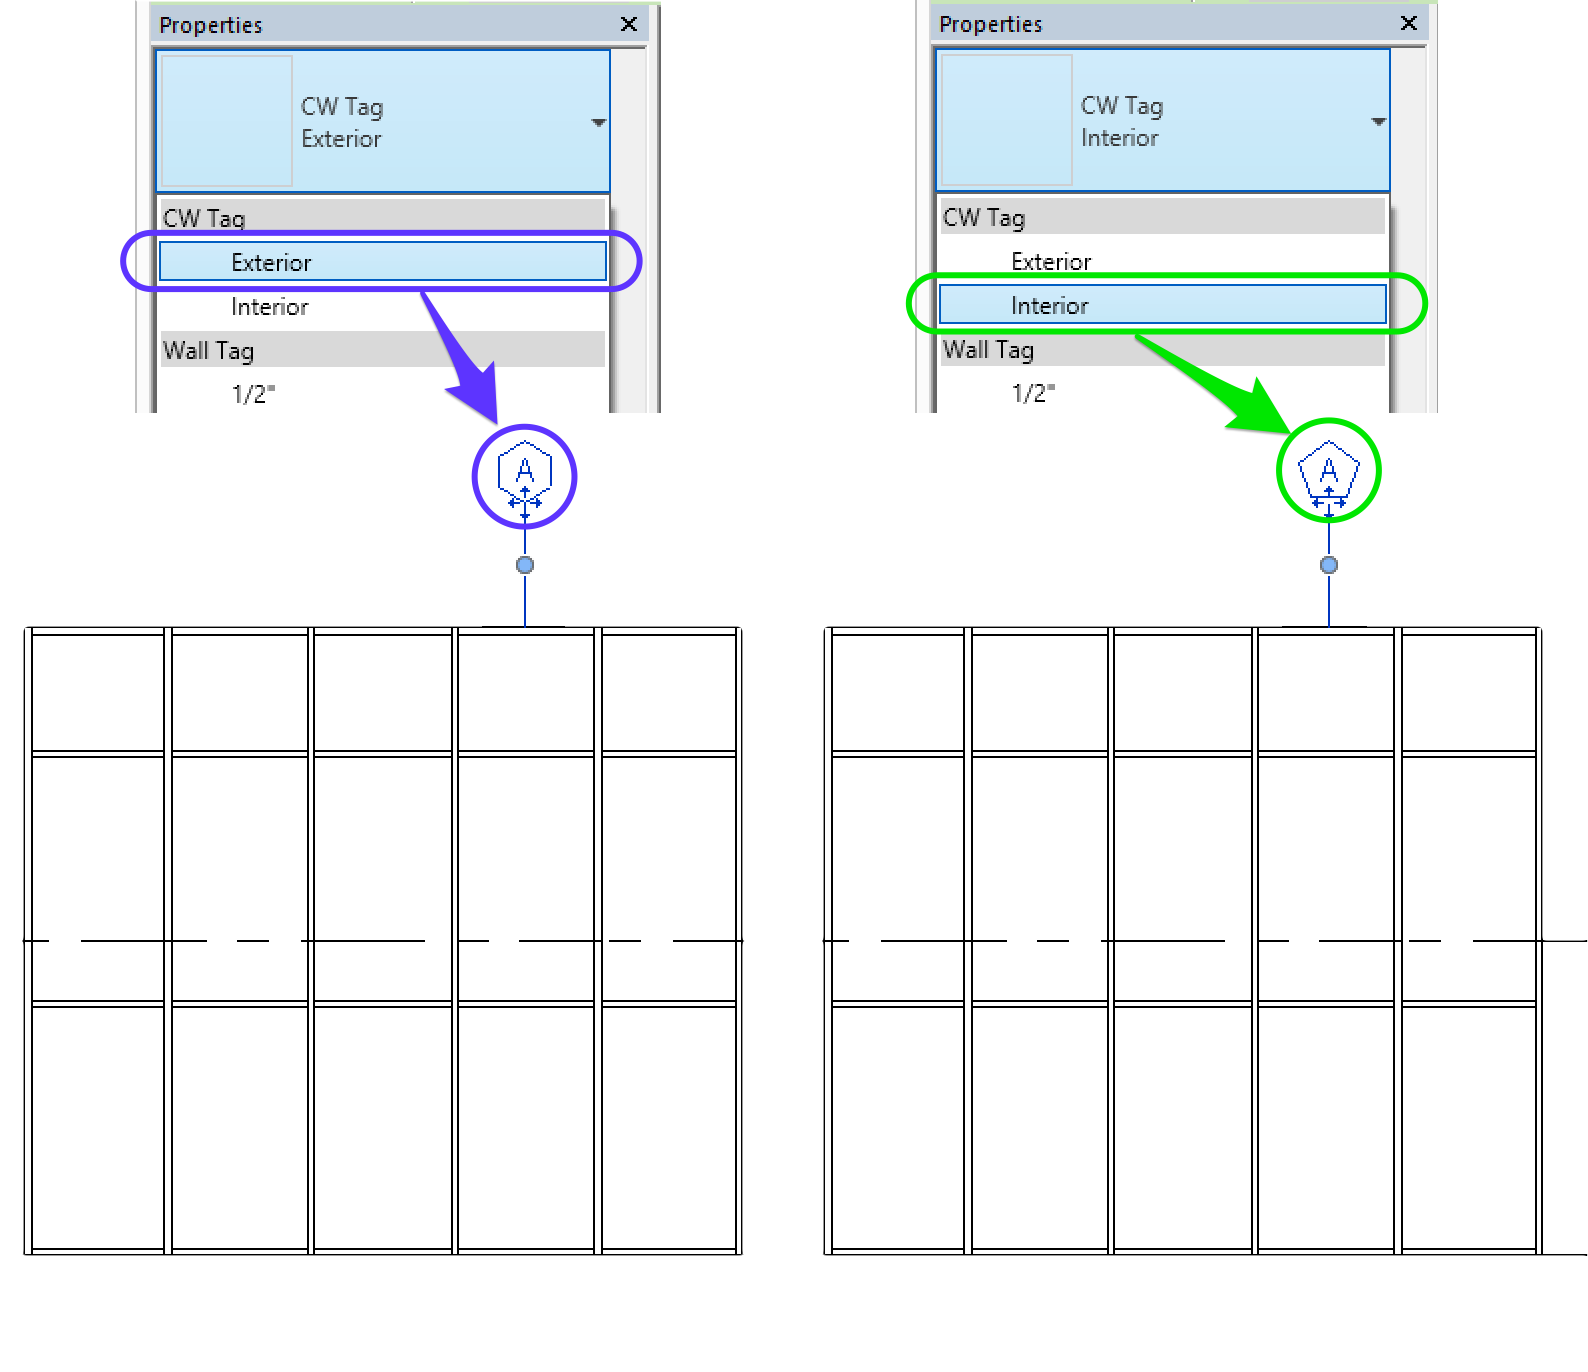
Switching Curtain Wall tag
Back in the Project, tag the curtain wall. Next, select the tag, from the Properties menu, click the pull down menu to select the CW tag family you loaded into the project. You should see the two Family types you have created earlier – Exterior and Interior Type – for your selection. Try switching between the Exterior and Interior type to see the symbol changes from one to another.
Accurate and excellent!
Exactly what I was looking to do! Thanks!
Much appreciated!