If you ever done a curtain wall, you will notice adding a door to the curtain wall is very different from adding a door to a wall. For those who have never done one before, I have written a topic on how to Add a door to the curtain wall.
Revit treats the entire curtain wall and door as one assembly, because of that, we can only assign Phasing to the entire curtain wall element. When you select the entire curtain wall, the Phasing in Properties is actived. But if you select the door only, you will see that the Phasing is grey out in Properties.
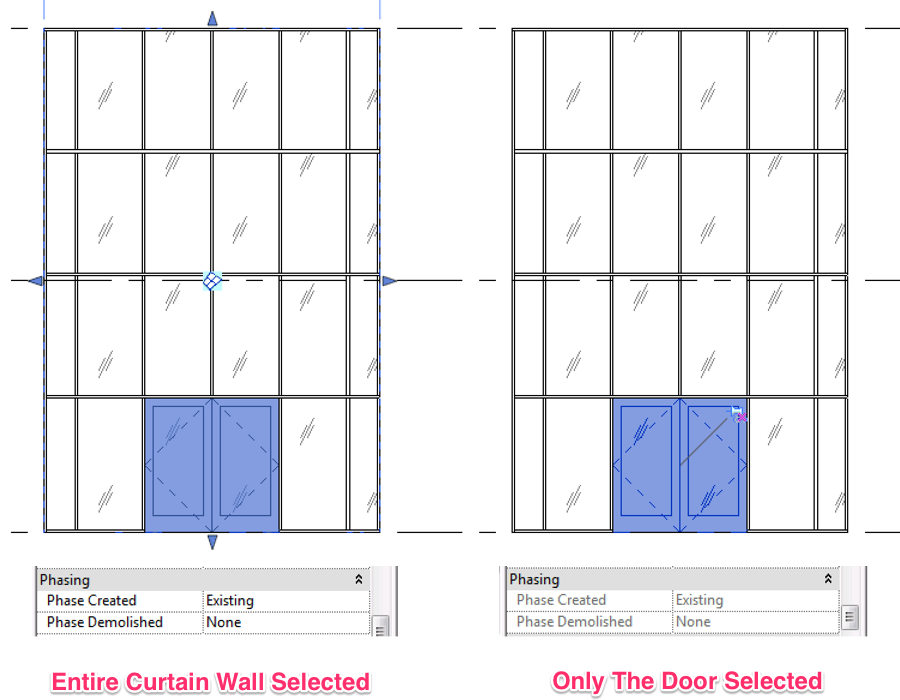
Knowing that we cannot assign Phasing selectively to the door within the curtain wall, the only way around is to detach the door from the curtain wall element and make the door as a separate stand alone element. In this tutorial, I assumed you already created the curtain wall.
Create a Door Opening in the Curtain Wall
Go to the Elevation View of the curtain wall and follow one of the two scenarios:
Scenario 1: If you have already added a door to the curtain wall
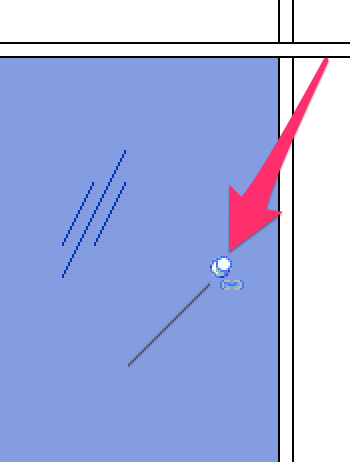
Hover the mouse over the door, use the “TAB” key on your keyboard to select the door only. (Unfortunately, this door will need to be deleted and recreate again. Don’t panic! I will show you the steps below.)
Scenario 2: If you have not added a door to the curtain wall yet
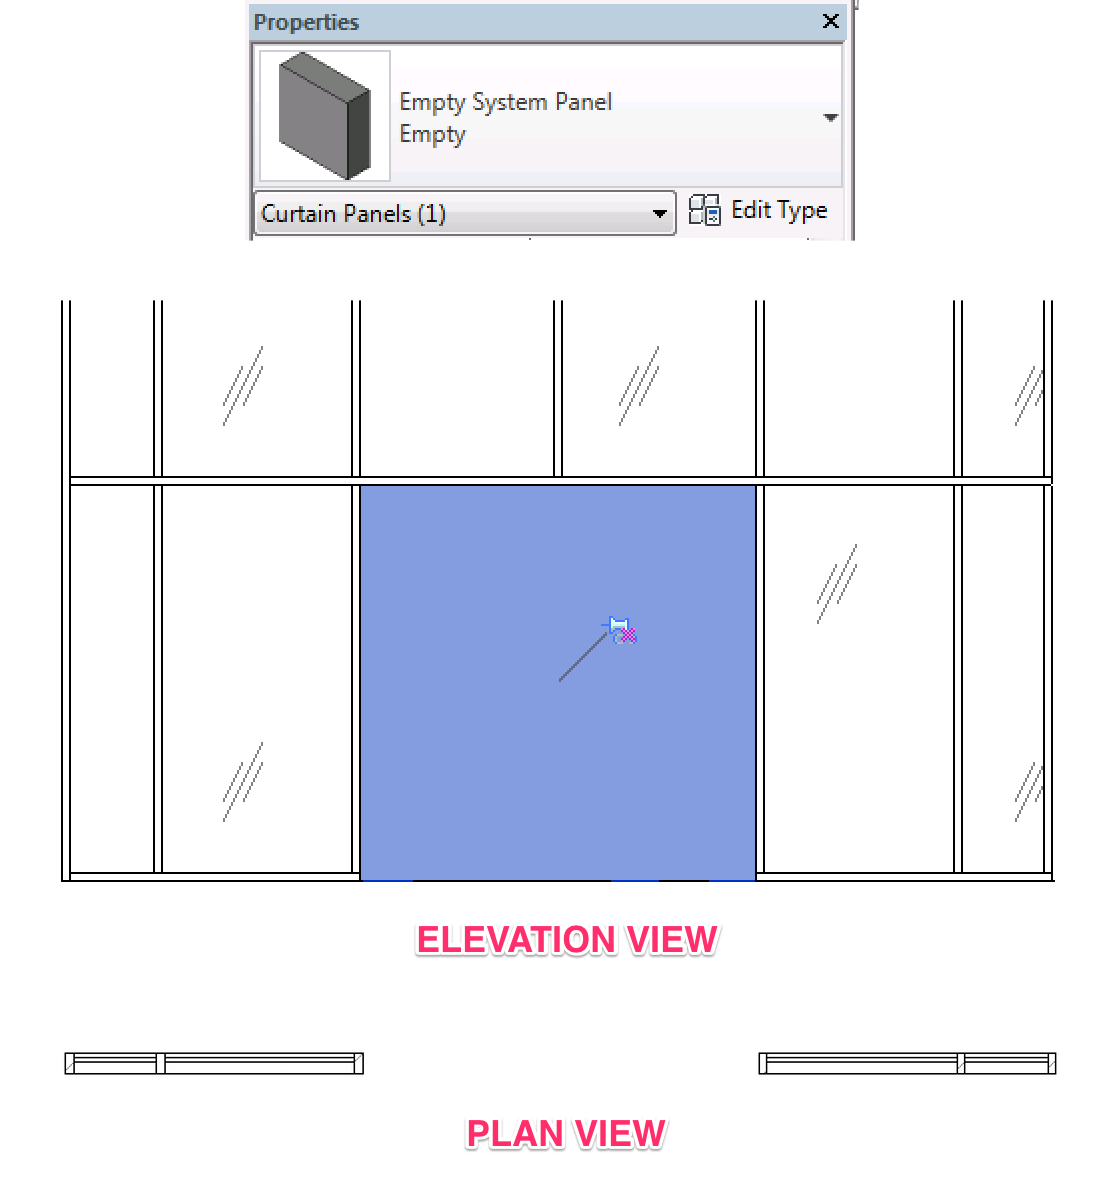
Use the “TAB” key on your keyboard to select the pane of glass where the door is going to be located, then click on the Pin icon to Unpin it.
With the door or the pane of glass selected, go to Properties and select Empty Panel** from the list. It will turn the selected element into an opening.
** If the Empty Panel is not already on the list, you can go to “C:\ProgramData\Autodesk\RVT 2015\Libraries\” to look for the “Curtain Wall Panels” folder for the file “Empty Panel.rfa”.
Note: Instead of swiping the glazing with an Empty Panel, you can also use Edit Profile to cut the outline of the Door Opening in the Curtain Wall. Pro and Cons about this method – Pro: You will not see the Warning Message I mentioned below when you add the door in. Con: If you ever need to adjust the door opening size, you will need to adjust the vertical Curtain Grid as well as go into Edit Profile to adjust the opening size. With the swiping glazing method above, you only need to adjust the vertical Curtain Grid and you are done.
Adding the Door
Next, we will create a new curtain wall type that consist of only a door. Yes! That is right! Only a door! This curtain wall type only has a door, nothing else. We will be placing it at the curtain wall opening we just created.
Go to the Existing Plan View, on to Architecture tab > Wall (under Build panel).
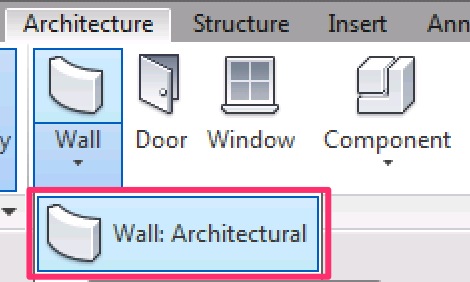
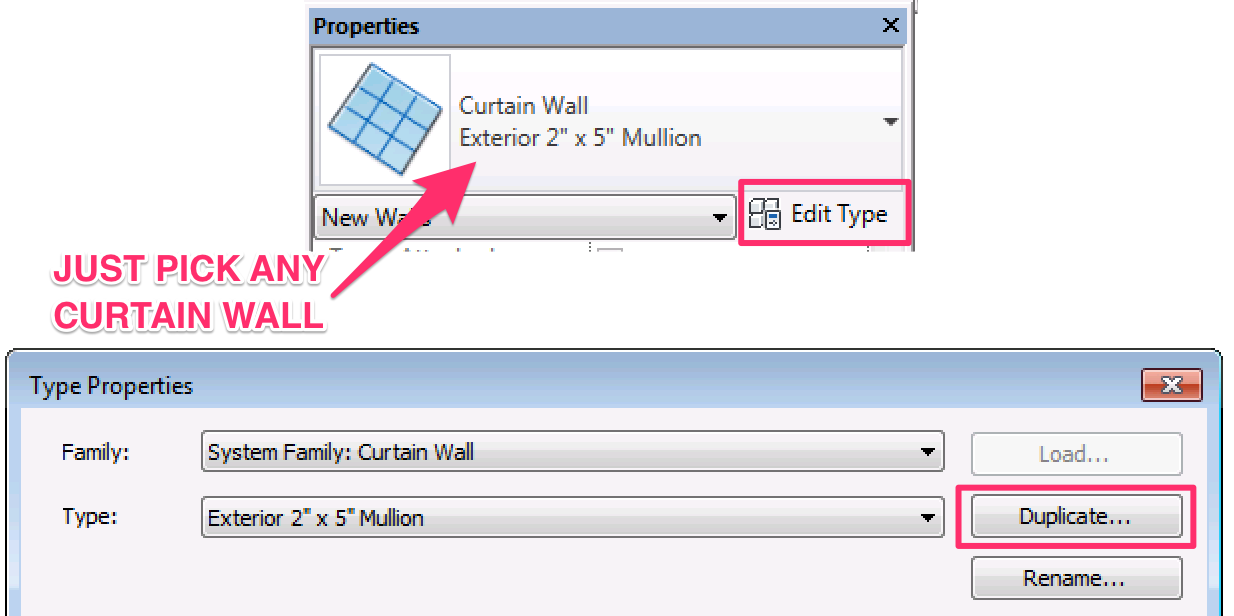
Go to Properties, scroll down to the Curtain Wall category and select any curtain wall, then click Edit Type. In the Type Properties, click Duplicate to create a new type.
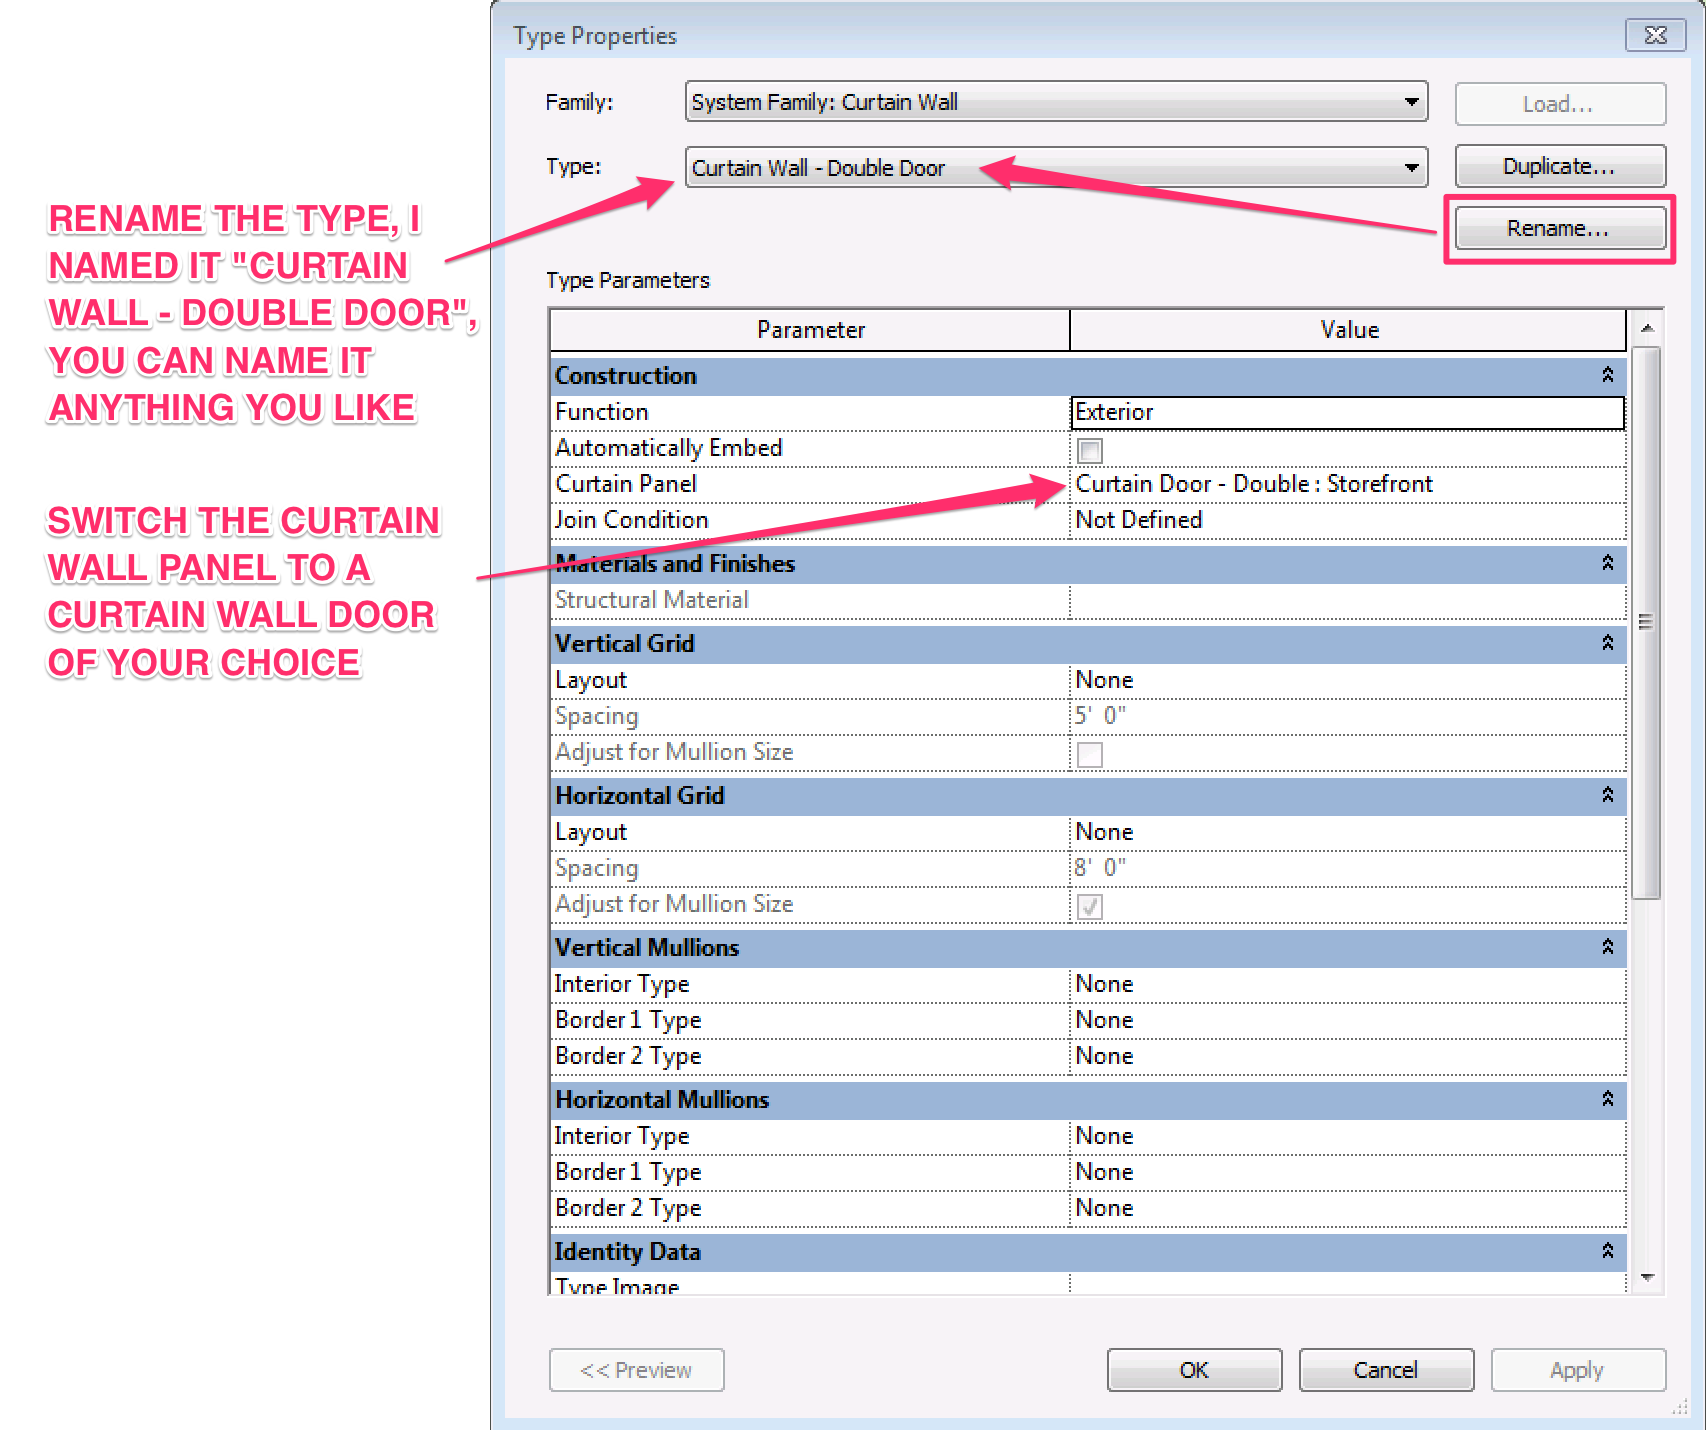
Follow the image below for the settings. Under Construction > Curtain Panel parameter, make sure to swap out the “System Panel” with “Curtain Wall Door”. This is a critical step that turn the glass panel into a door. Once you are done, click OK to exit out.
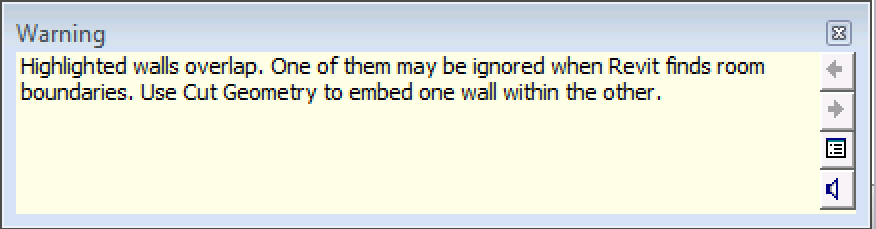
Now, in the Existing Plan View, draw this new curtain door at the curtain wall opening we created earlier. (Ignore the warning. Even though we created the opening with an empty panel, Revit still thinks the curtain wall we are drawing now overlap with the empty panel).
You should immediately see the result! Make sure to go to the Elevation View or Properties to adjust the door height.
Adjust the Phasing
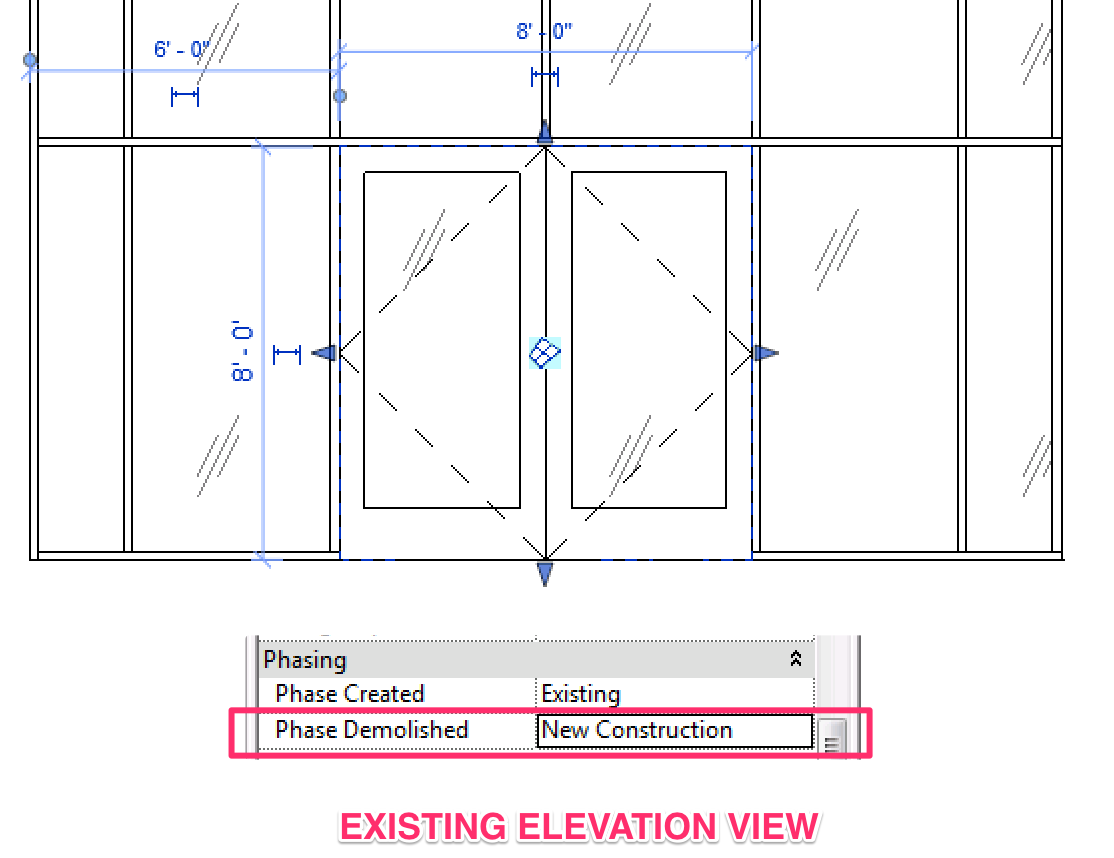
Still in the Existing Plan View, try selecting the door, Phasing in Properties is now activated. In the Phase Demolished, change that to New Construction.
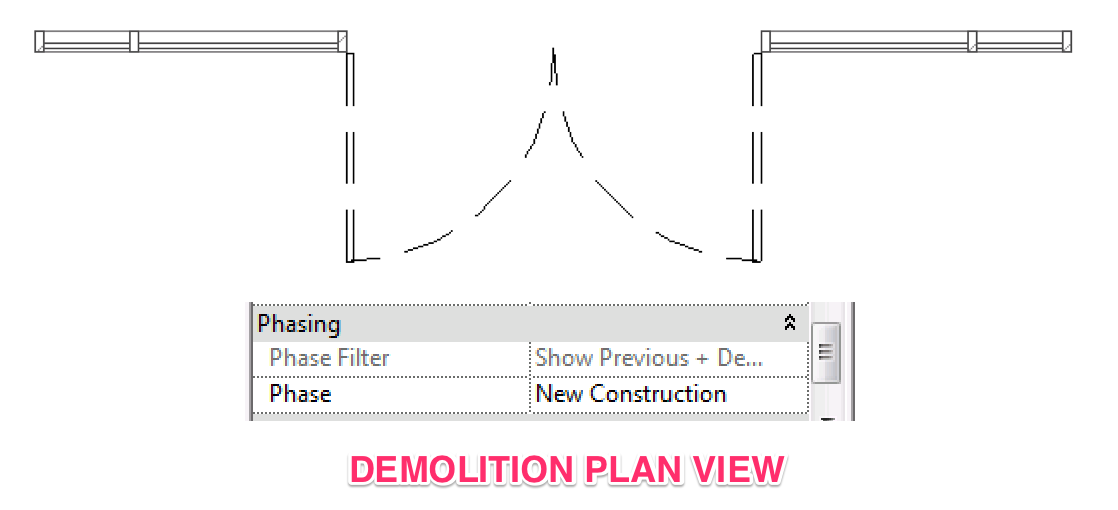
Open up the Demolition Plan View and the door is now shown as dashed – demolished door.
It does take a few steps to turn one door into a demo door. However, I believe it is worth the effort to model everything properly in the first place, so everything is showing up correctly on all views and schedule.
In the next post, I will show you another method to achieve the same result.
How to show Demolition Door in an Existing Curtain Wall? – Method 2
We must be on the same train but going in opposite directions. I just blogged about demolishing a curtain panel in an existing curtainwall to insert an entry door – http://blog.wbassociates.com/?p=1410. Nice tutorial!
Too funny! At least we are going to the same destination. 😉