Have you ever discussed with other Revit users on how to model certain things in Revit? You will be suprised how many different ways people have come up with to achieve the same result. With a little creativity, you might even get the same result 2 times faster than the guy sitting next to you, and that is what I called Efficiency. In the previous post, I have showed you one solution to demolish a door in an existing curtain wall system, I am going to show you a second solution in this post.
In order to provide a full steps by steps for this solution, I need to borrow some of the steps from the previous post. For those who have already read the post from Method 1, please bear with me. In this tutorial, I assumed you have already created the curtain wall.
Adding a wall infill at the door opening in the Curtain Wall
Go to the Existing Elevation View of the curtain wall and follow one of the two scenarios:
Scenario 1: If you have already added a door to the curtain wall
Hover the mouse over the door, use the “TAB” key on your keyboard to select the door only. (Unfortunately, this door will need to be deleted and recreate again. Don’t panic! I will show you the steps below.)
Scenario 2: If you have not added a door to the curtain wall yet
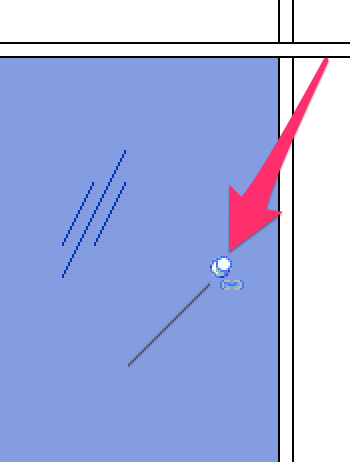
Use the “TAB” key on your keyboard to select the pane of glass where the door is going to be located (the glass size must match the door opening size), then click on the Pin icon to Unpin it.
With the door or the pane of glass selected, go to Properties and select a Wall Type** from the list. It will turn the selected element into a wall. Write down the height and width of this “infill wall”, we will be customizing a door later to match the size of this infill wall. The wall might not align properly with the curtain wall initially, it can be fixed in the Properties. With the wall selected, go to Properties, adjust the Location Line Offset number.
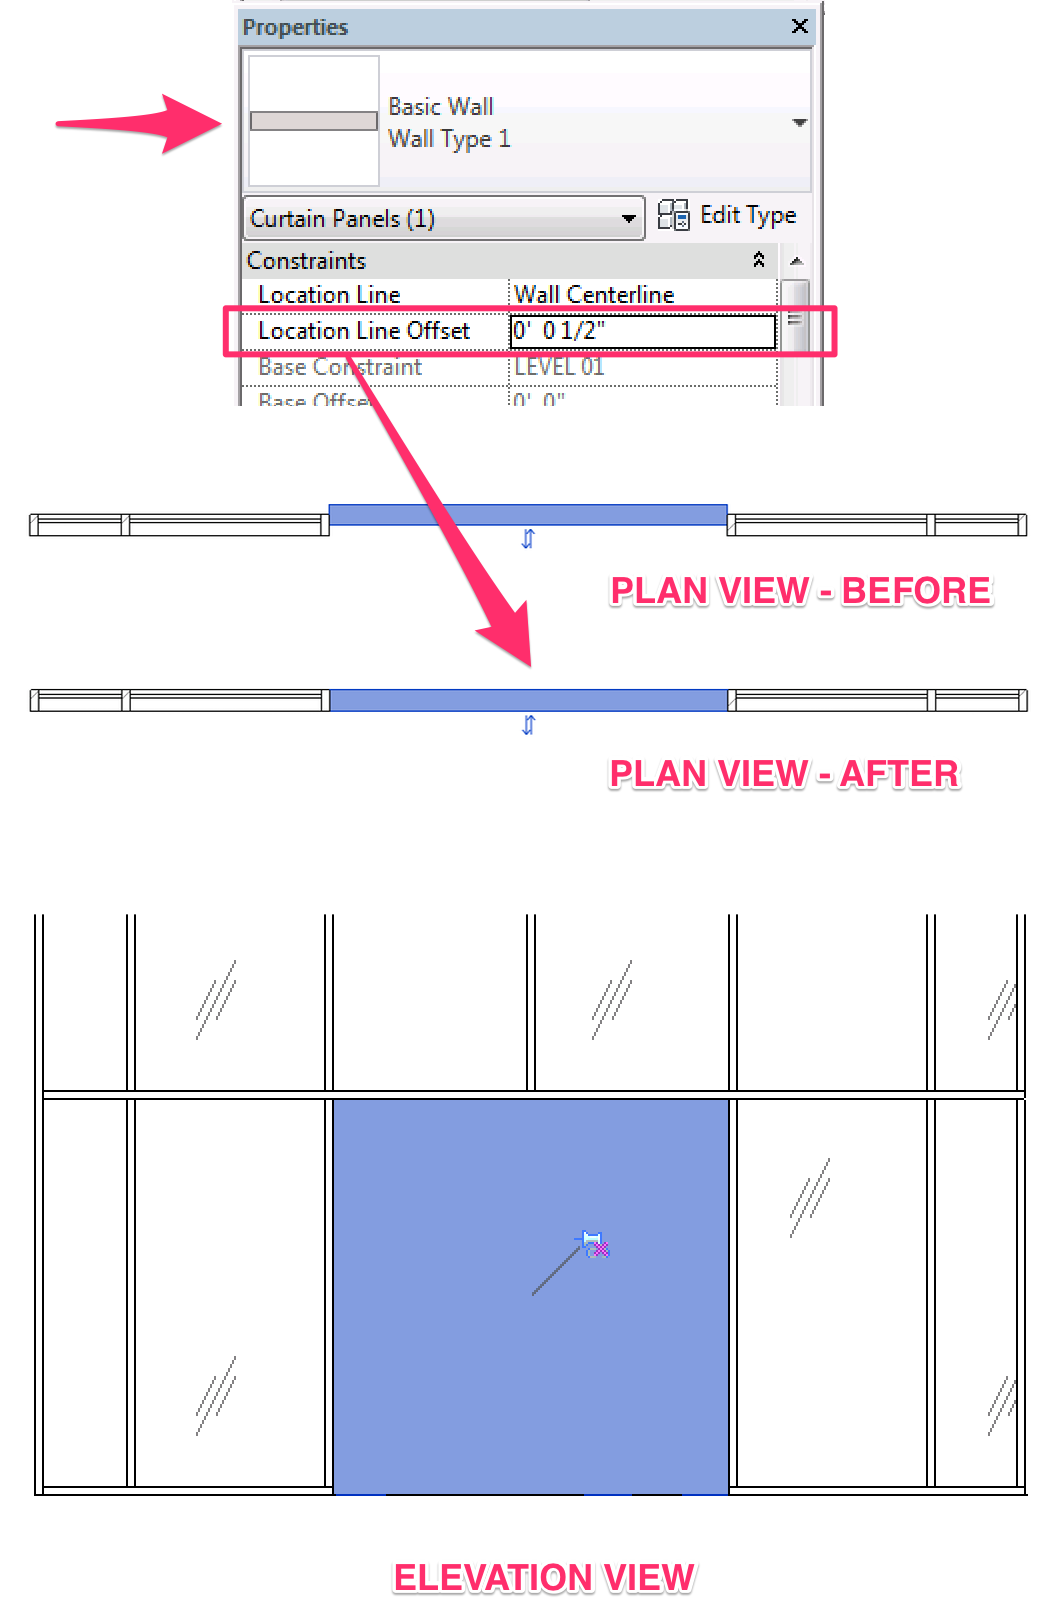
**The Wall Type selected needs to match the thickness of the curtain wall. Create a new wall type as needed if you don’t have one that match the curtain wall thickness. Why? Depending on the door you insert, some door frame will match the thickness of the wall. To avoid door frame looking funny in the plan view, make the wall thickness same as the curtain wall.

Q&A
Q: Why are we adding a wall to the Curtain Wall?
A: With this method, we used the wall as a host and insert the door like we normally does into a wall.
Adding the Door
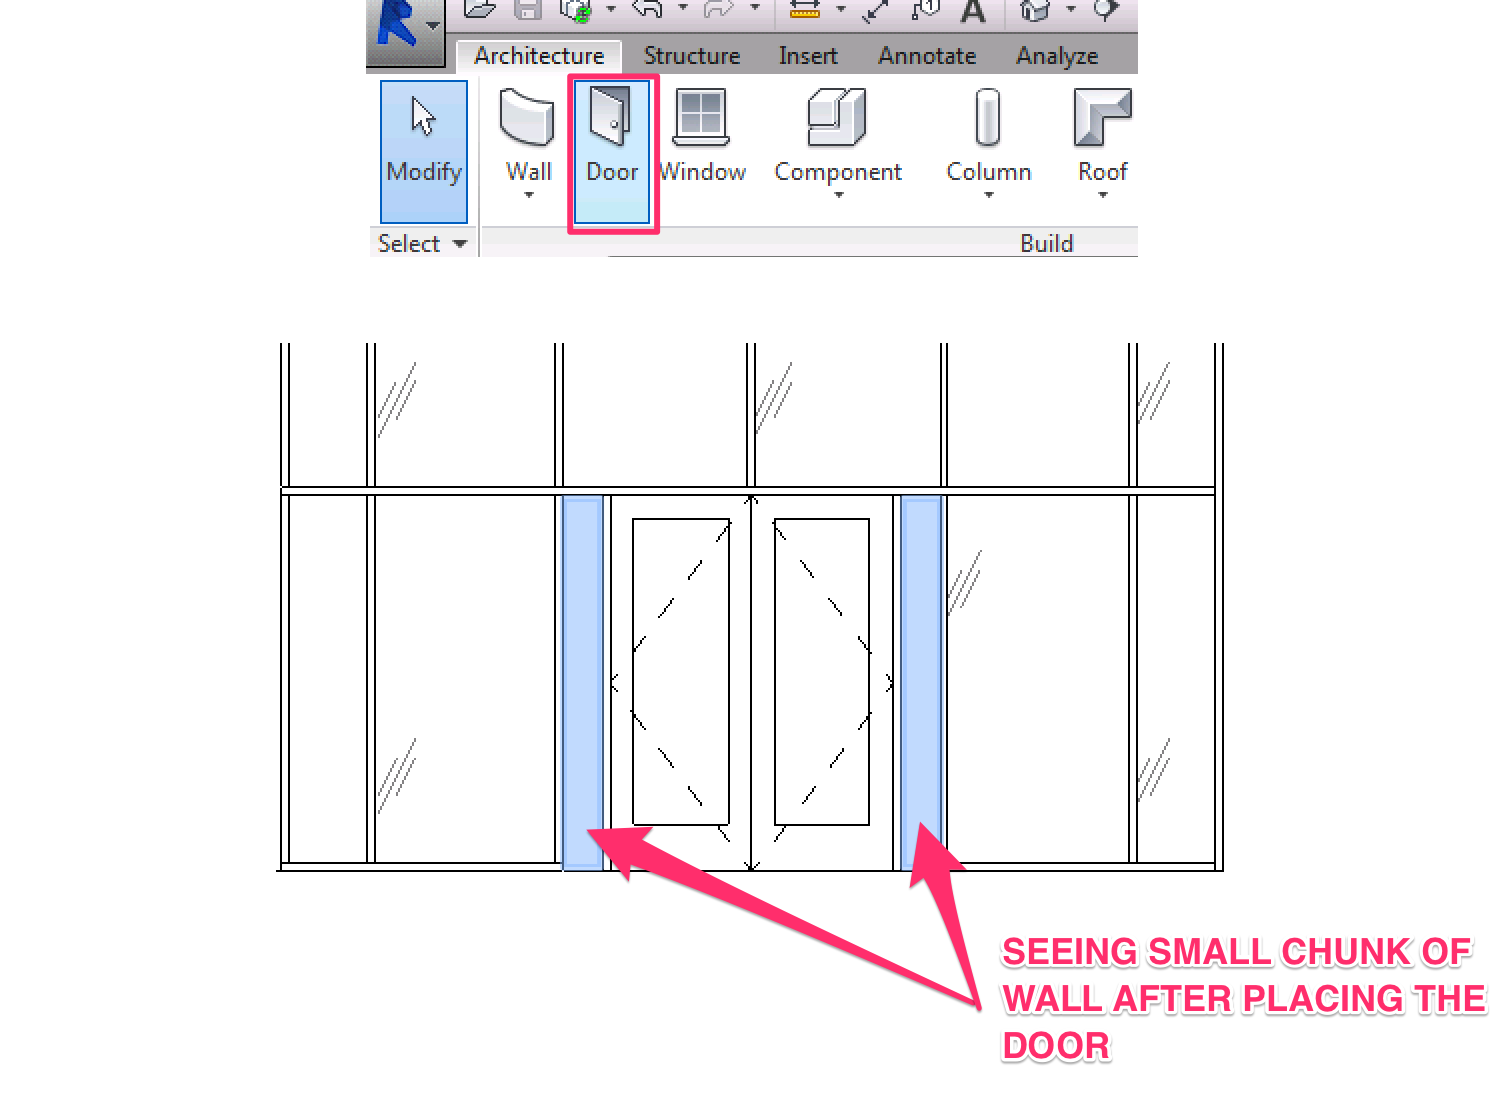
In the Existing Plan View. Go to Architecture tab > Door (under Build panel). Select the door you wanted to place in from the list. Insert the door to the wall you just created in the Curtain Wall. Notice the door doesn’t fill up the entire wall? This is because the door is set to a fixed size per the door type properties.
Resize the Door
Our goal is to make sure the door fill up the the entire wall inside the curtain wall. Let’s resize the door.
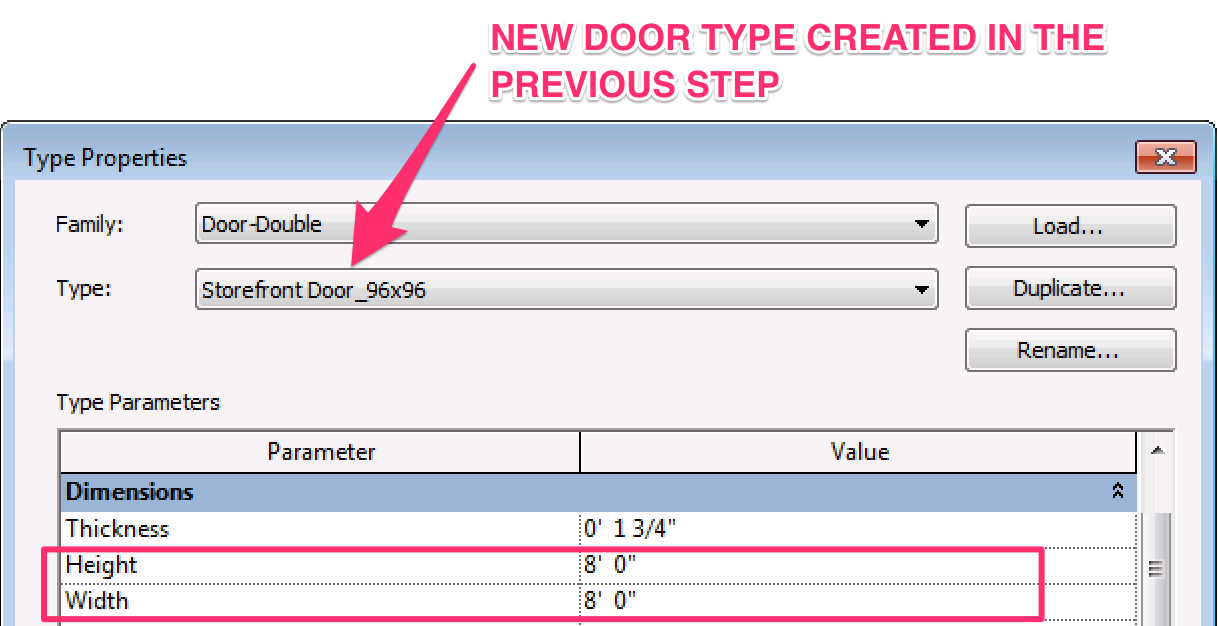
Select the door, go to Properties, click Edit Type. In the Type Properties, click Duplicate to create a new type.
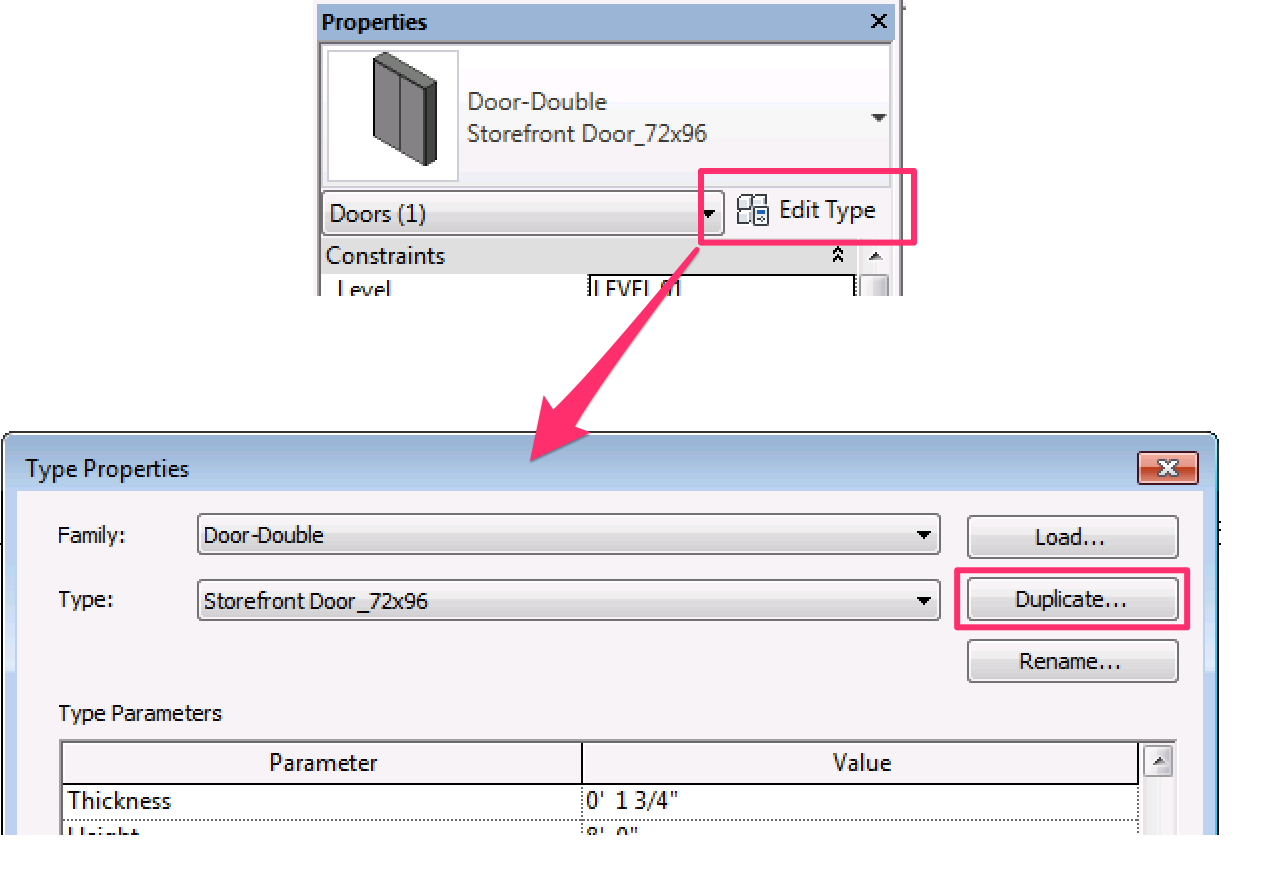
Scroll down to Dimensions > Adjust the Height and Width parameter as necessary to match the exact size of the infill wall in the curtain wall.
Adjust the Phasing
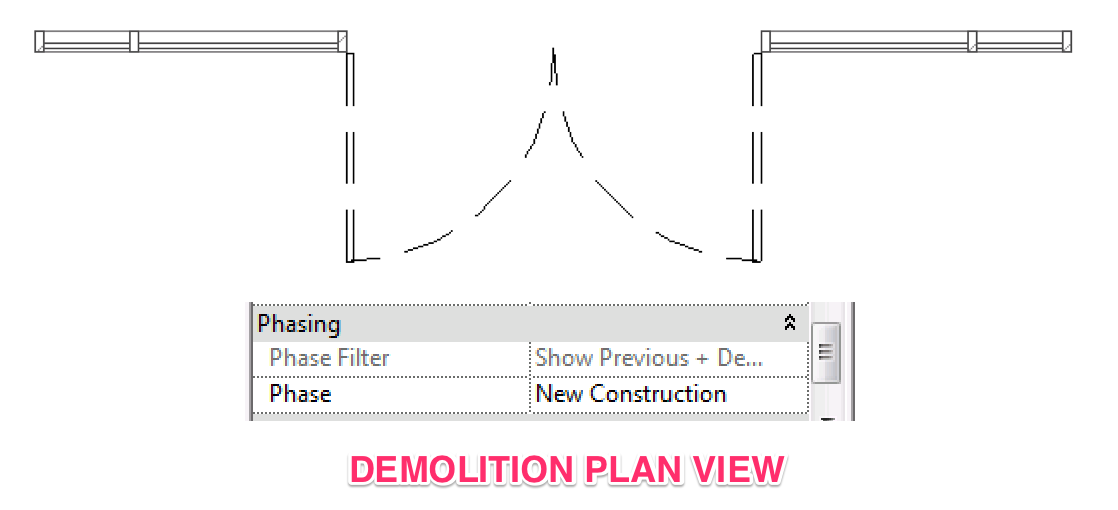
Still in the Existing Plan View, try selecting the door, Phasing in Properties is now activated. In the Phase Demolished, change that to New Construction.

Open up the Demolition Plan View and the door is now shown as dashed – demolished door.
After thoughts…
Both Method 1 and Method 2 will bring you the same result. What are the pros and cons of each method?
Method 1 | PROS: The door is sized automatically according to the curtain wall opening created. If you ever need to resize the door, you just need to adjust the mullion location, very simple and straight forward. CONS: The limited choice of “Curtain Wall Door” selection.
Method 2 | PROS: More choice in door selection, basically any door you can insert into the wall can be used here. If your new door requires a subframe, it can easily be achieved with this method. CONS: More steps involved in sizing the door. If you ever need to resize the door, you will have to adjust both the curtain wall opening and also the door type properties.
I personally prefer Method 1, leave me a comment on what your preference is and why.
How to show Demolition Door in an Existing Curtain Wall? – Method 1
Thank you so much for sharing with us your experience. It is very helpful for us to learn Revit.
Please keep posting.
Regards
Pooja
Thank you for sharing this tip