I recently received a question from a Revit user asking about assigning Sheets to the correct disciplines. This is an excellent question. I remembered I came across some frustration when sorting the sheet list for the first time.
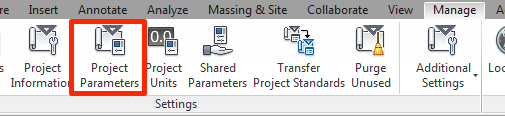
To effectively sort the sheet list, I introduce a parameter called “Discipline Order” to the sheet list. Go to Manage tab > click Project Parameters (under Settings Panel).
I will make this parameter a Project Parameter. With the Project Parameter window open, click ADD. Follow the image below to create this parameter. Make sure you check the “Sheet” check box in the Categories scroll down menu.
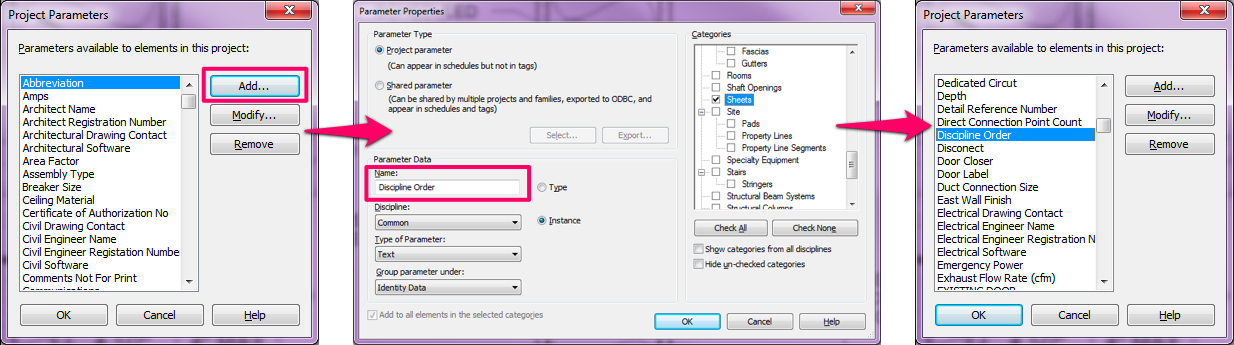
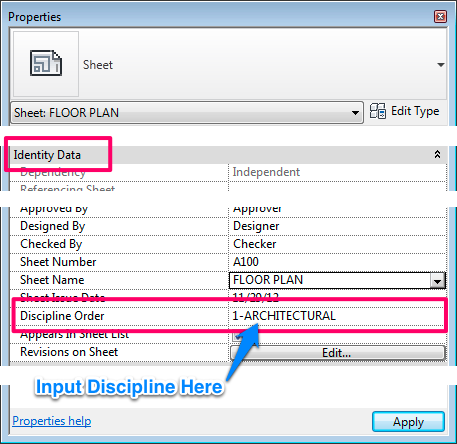
With the “Discipline Order” parameter created. Open any Sheet and look at the Properties menu. You should see your newly created parameter under Identity Data in the Properties menu. Start entering the appropriate discipline** (i.e. Architecture, Structural, Mechanical, Electrical, Plumbing, etc..) into the sheet properties. We are now ready to use this parameter to sort the sheets.
From your Project Browser, scroll down to Schedules and select the Sheet List. (If you have not created one yet, go to View tab > Schedules (under Create panel) > Sheet List.) From the Sheet Properties, click Fields.
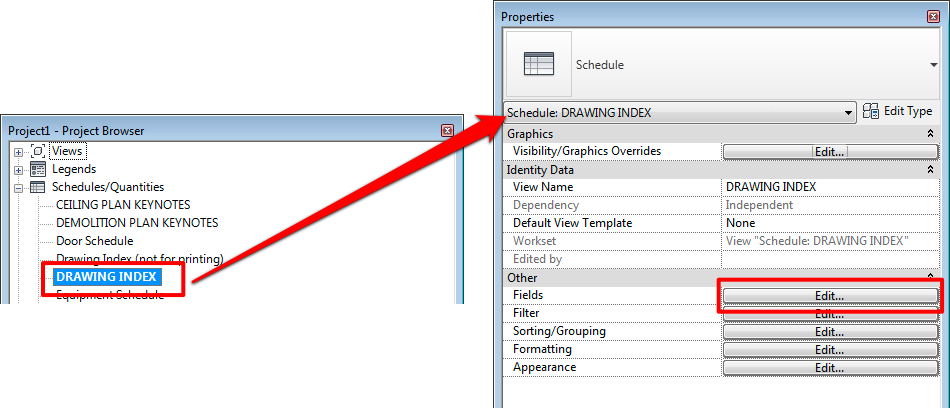
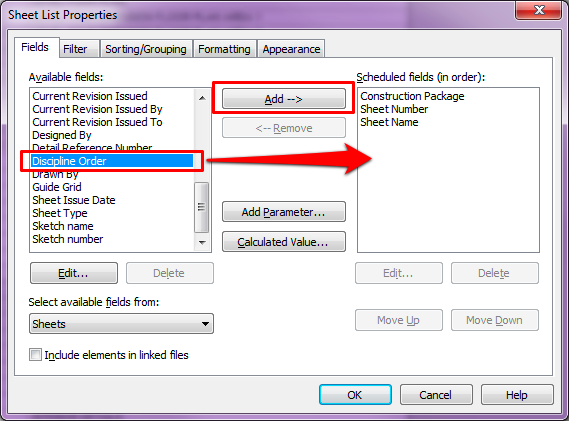
Go to the Sheet List Properties > Fields > Add “Discipline Order” parameter from the “Available Fields” (left) to the “Scheduled Fields” (Right).
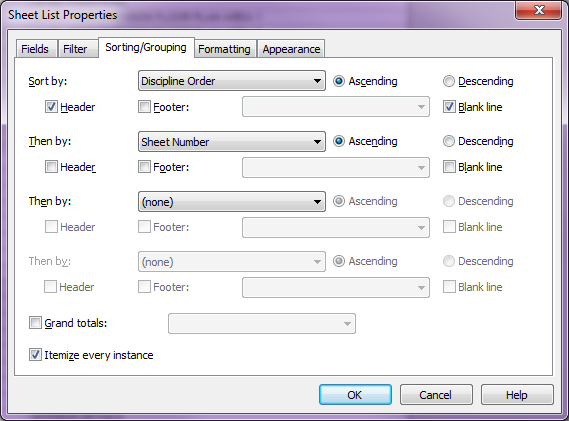
To sort the discipline. Click the Sorting/Grouping tab and follow the image below for the settings. What I am doing here is to tell Revit to sort the Sheet List by Discipline Order first, then sort by Sheet Number.
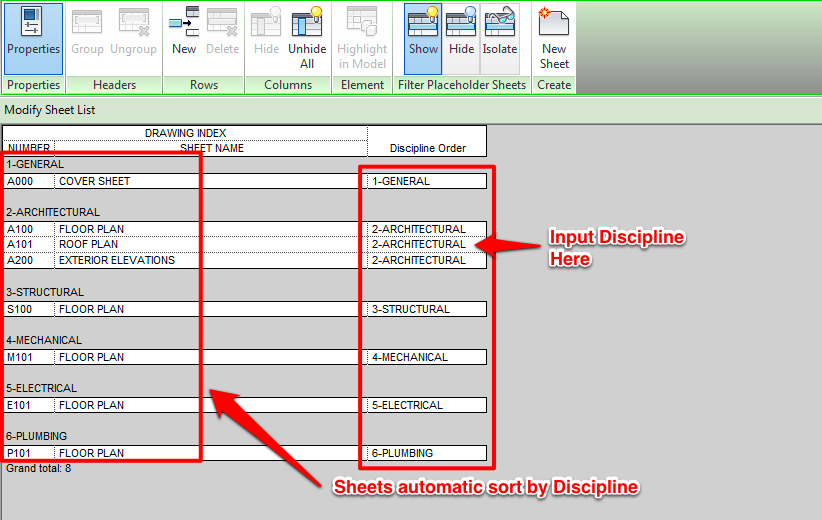
If you need to add Placeholders to the Sheet List, you can as well take advantage of this Discipline Order parameter. Go back to the Sheet List and add the Placeholder Sheet as you normally would. (Refer to this blog post – Adding Other Disciplines to Sheet List – for step by step instruction on adding a Placeholder Sheets). In the discipline Order column, type in the discipline. Once you input the discipline, Revit will automatically move your Placeholder sheets to the correct discipline.
** I would suggest adding a number before the discipline. For example, 0 – Demolition, 1 – Architecture, 2 – Structural, 3 – Mechanical, 4 – Electrical, 5 – Plumbing… and so forth. This gives you better control on the discipline order.
Since we have already created the Discipline Order parameter, we can take advantage of it to organize the Sheets structure in the Project Browser. Please read my next blog post “Adding Folder to Organize Sheets in Project Browser“.
Thank you!
Hi, how do you combine Electrical sheets that need to arrange as follow:
ED2.01
E2.01A
I created a parameter so E2.01A goes below ED2.01 but it creates a gap/space between them. Do you have any idea how to avoid creating a gap in between? Hope you can help me, Thanks for your time.
Ed, create a Sheet Order Parameter to control the sheet order.