I received an email from my blog reader asking how to turn off the floor pattern from the consultant’s model that’s linked into the project. I think this is an excellent question worth explaining as I had the same problem when I first started using Revit. It is actually a very simple process if you know the trick. I am going to answer the reader’s question by going thru it step by step in this post.
- Open the plan view that you want the floor pattern to turn off.
-
Type in VG to open Visibility Graphics. Click on the Revit Links tab > Select the consultant’s model > Click the By host view button.
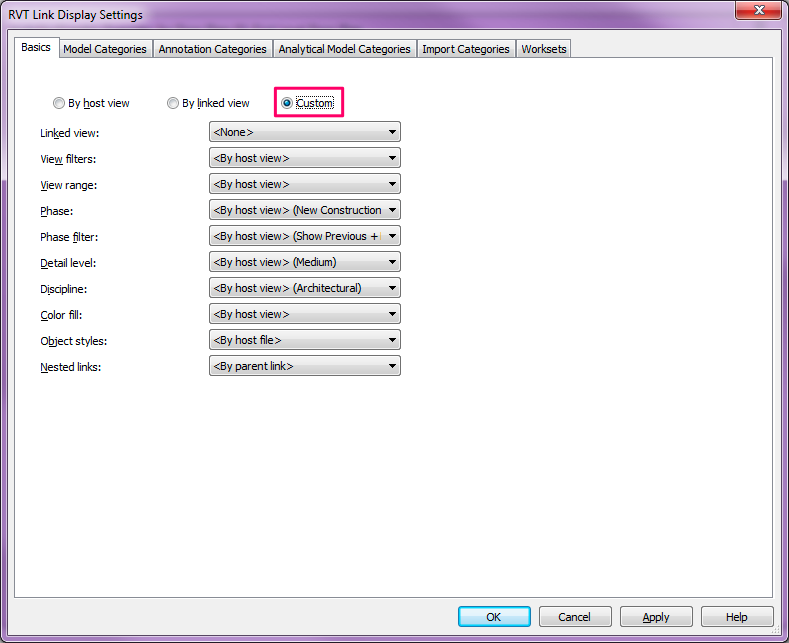
- The RVT Link Display Settings window is now opened. Go to the Basic tab > select Custom

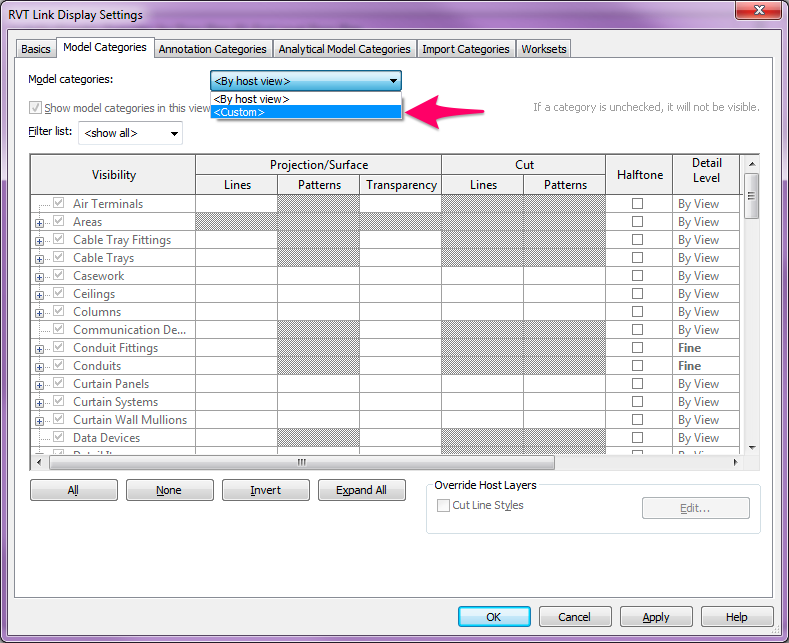
- Go to Model Categories tab, from the pull down menu, select <custom>. (You are free to control the visibility of all the elements from your consultants model at this point. You can also click the other tabs, follow the same step to select <custom> from the pull down menu to control visbility of Annotation, Worksets, etc.)
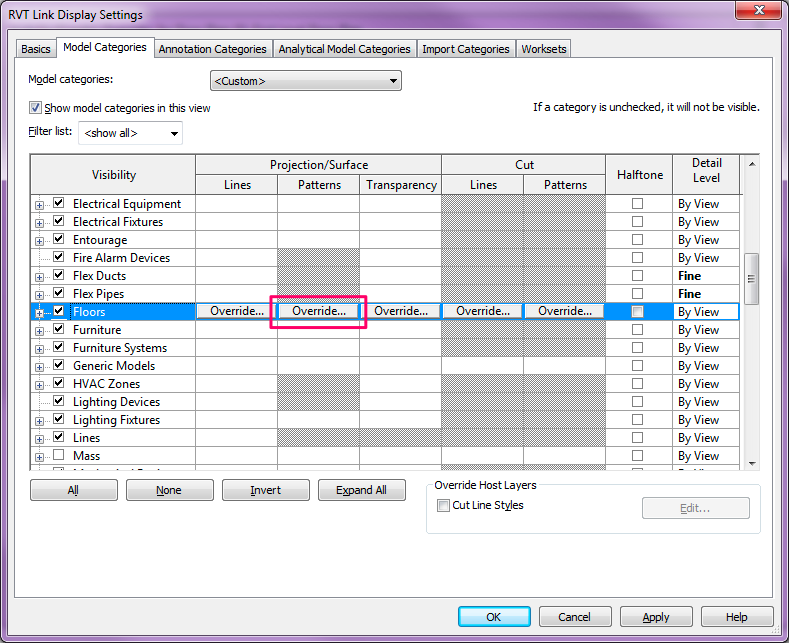
- The entire table now becomes available for customization. Scroll through the table until you see “Floors”. Click Floors > Override… from the Projection/Surface – Patterns column.
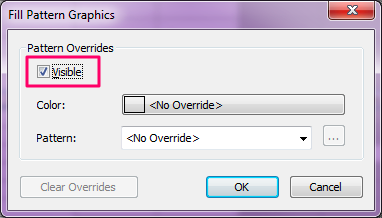
- In Fill Pattern Graphics window, unchecked the Visible box. Click OK to exit out all the windows. The floor pattern should now disappear in the view.
Note: Keep in mind this changes applies to this view only. You will need to do the same process again if you have another plan view that needs to make the same changes. If you have multiple views that requires the same changes, I would suggest you to create a View Template and apply it to all the views. This way you do not have to adjust the VG settings over and over again.


Unless, of course, if your Revit Links tab is controlled by a view template. Then all views under the same view template will also update.